Gluten-Free Almond Milk Pancakes (Naturally Sugar-Free)
Are you looking for a proper gluten-free almond milk pancake recipe that actually works? No sweat – I’ve got you covered!
I’ve been a coeliac for over 30 years now, and pancakes were one of those things I really missed after my diagnosis. Shop-bought gluten-free pancakes? Expensive and often disappointing. Most recipes I tried resulted in flat, gummy disasters.
But this recipe? This one’s a keeper. I’ve tested it multiple times in my little kitchen in Hertfordshire, tweaking and perfecting until I got pancakes that are genuinely fluffy, properly cooked through, and taste absolutely delicious.
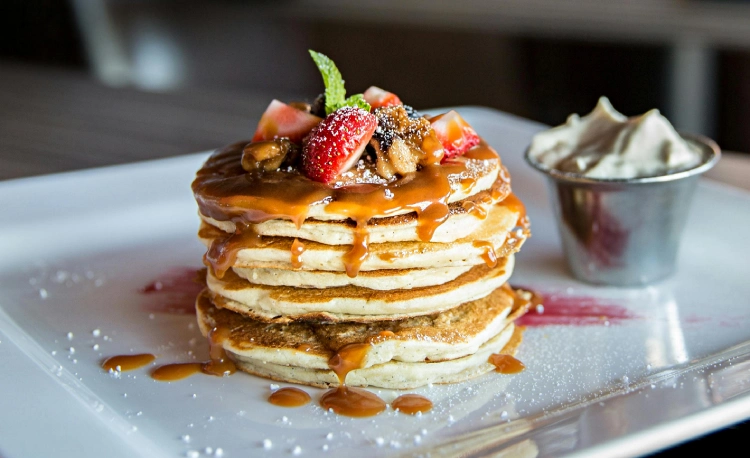
Table of Contents
Why Sugar-Free Almond Milk?
I started using sugar-free almond milk in this recipe after realising that many almond milks have added sugar that you just don’t need. The pancakes are sweet enough from the natural ingredients without extra sugar.
I use Orasì Sugar-Free Almond Drink because it’s got a clean taste and creates the right consistency. Plus, it’s naturally dairy-free which makes these pancakes suitable for anyone avoiding lactose as well as gluten.
Ingredients (Makes 8-10 pancakes)
Dry Ingredients:
- 200g gluten-free plain flour (I use Doves Farm Freee blend)
- 2 tsp gluten-free baking powder
- 1 tsp xanthan gum (if your flour blend doesn’t already contain it)
- Pinch of salt
- 2 tbsp caster sugar (or use a sugar substitute)
Wet Ingredients:
- 2 large eggs
- 250ml sugar-free almond milk
- 2 tbsp melted butter or vegetable oil (plus extra for frying)
- 1 tsp vanilla extract
Method
Step 1: Mix Your Dry Ingredients
In a large mixing bowl, whisk together the gluten-free flour, baking powder, xanthan gum (if using), salt, and sugar. Make sure everything’s well combined – you don’t want clumps of baking powder in your pancakes!
Step 2: Prepare Your Wet Ingredients
In a jug, beat the eggs lightly. Add the sugar-free almond milk, melted butter (or oil), and vanilla extract. Give it a good whisk until everything’s combined.
Step 3: Combine (But Don’t Overmix!)
Pour the wet ingredients into the dry ingredients. Stir gently until just combined. The batter should be slightly lumpy – that’s fine! Overmixing gluten-free batter can make pancakes tough and dense.
Let the batter rest for 5 minutes. This gives the gluten-free flour time to absorb the liquid properly, which helps create fluffier pancakes.
Step 4: Cook Your Pancakes
Heat a non-stick frying pan over medium heat. Add a small knob of butter or a drizzle of oil.
Once the pan’s hot (test by flicking a tiny bit of water on it – it should sizzle), pour in about 3 tablespoons of batter per pancake. Don’t make them too big or they’ll be difficult to flip!
Cook for about 2-3 minutes until bubbles form on the surface and the edges look set. This is crucial – wait for those bubbles!
Flip carefully using a fish slice and cook for another 1-2 minutes until golden brown.
Keep your cooked pancakes warm on a plate covered with foil while you cook the rest.
My Top Tips for Perfect Gluten-Free Pancakes
Don’t Skip the Resting Time: Those 5 minutes make a real difference to the texture.
Get the Temperature Right: If your pan’s too hot, the pancakes will burn on the outside and be raw in the middle. Medium heat is your friend.
Wait for the Bubbles: Don’t flip too early! Wait until you see bubbles forming and popping on the surface.
Use a Good Non-Stick Pan: Gluten-free pancakes can be more delicate than regular ones, so a good non-stick pan is essential.
Check Your Baking Powder: Make sure it’s definitely gluten-free. Some aren’t! And check it’s still in date – old baking powder won’t give you fluffy pancakes.
Serving Suggestions
I love these pancakes with:
- Fresh berries and a drizzle of maple syrup
- Sliced banana and a dollop of Greek yoghurt
- Lemon juice and a sprinkle of sugar (classic!)
- Crispy bacon and maple syrup (sweet and savoury perfection)
- Chocolate spread if you’re feeling indulgent
Frequently Asked Questions
Here are some frequently asked questions about these delicious gluten-free pancakes:
Can I Make These Dairy-Free?
Yes! This recipe is already dairy-free if you use oil instead of butter for frying. The sugar-free almond milk means they’re naturally lactose-free.
Can I Freeze These Pancakes?
Absolutely! Let them cool completely, then layer them between pieces of baking parchment and pop them in a freezer bag. They’ll keep for up to 3 months.
To reheat, just pop them in the toaster or microwave for 30-40 seconds. Perfect for quick weekday breakfasts!
Nutritional Information (Per Pancake)
Approximately:
- Calories: 120
- Carbs: 18g
- Protein: 3g
- Fat: 4g
Note: This is an estimate and will vary depending on the specific ingredients you use.
Why This Recipe Works
Gluten-free pancakes can be tricky because you don’t have gluten to give structure. That’s why the xanthan gum is important (if your flour blend doesn’t contain it already) – it helps bind everything together.
The sugar-free almond milk works brilliantly here because it’s light but still has enough body to create a good batter consistency. And the slight nuttiness from the almonds actually adds a lovely subtle flavour to the pancakes.
Photo credit
Photo by Ash Craig
Share the love!
Related recipes 🔗
Becky ✍️
![]() Hi, I am Becky. I am a passionate recipe maker and having been a coeliac (celiac) for 30+ years I focus on gluten-free recipes. My blog is my online cookbook of gluten-free tasty recipes. You can follow me on X: @beckygwg
Hi, I am Becky. I am a passionate recipe maker and having been a coeliac (celiac) for 30+ years I focus on gluten-free recipes. My blog is my online cookbook of gluten-free tasty recipes. You can follow me on X: @beckygwg
Meet Becky 👉
No comments yet.
Comments
There are no comments on this post. Leave a comment 👇